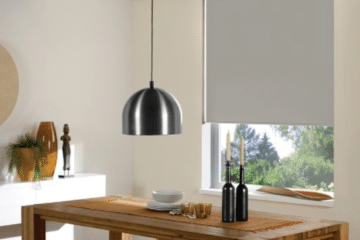
Window roller shades offer a clean, modern look while helping you control light and maintain privacy. They’re a smart choice for any room, combining simple style with everyday function that fits nearly every budget and home decor style.
If you’re trying to figure out how to install window roller shades without hiring a pro, you’re in the right place. This guide breaks down the process into quick and easy steps using basic tools, so even first-time DIYers can achieve great results.

Read on to learn the fastest way to get your shades up and working in no time. With clear steps and helpful tips, you’ll have them installed and ready to use in just minutes.
Why Choose Roller Shades?
Before diving into how to install window roller shades, it’s worth understanding why they’re a great choice:
- Easy to Use: Roller shades operate with a simple pull or spring mechanism.
- Space-Saving: They fit snugly against the window, making them ideal for small spaces.
- Light Control: Available in blackout, light-filtering, and sheer fabrics.
- Affordable: A budget-friendly alternative to curtains or blinds.
Tools Needed for Window Roller Shade Installation
Gathering the correct tools beforehand will make the installation much smoother. Here’s what you’ll need:
1. Roller Shade Kit
A roller shade kit comes with the shade, mounting brackets, and screws for easy setup. It’s everything you need to install your roller shade easily and keep it securely mounted on your window or wall.
2. Measuring Tape
Use a tape measure to measure the width and height of your window. Accurate measurements ensure a proper fit, prevent gaps, and help your roller shade function properly.
3. Pencil
A pencil helps mark the placement of brackets on your wall or frame. These light marks guide your installation and can be erased after mounting your roller shade in the correct position.
4. Screwdriver or Drill
Use a screwdriver to install your roller shade, or a drill for faster setup. A drill helps tighten screws more securely and speeds up the process without much effort.
5. Level Tool
A level tool keeps your roller shade straight during installation. If it’s not straight, the shade might roll unevenly. This simple tool helps create a clean and balanced final look.
6. Anchors & Plugs
Anchors and wall plugs are essential for drywall installations. They hold the brackets firmly in place, ensuring your roller shade doesn’t loosen or fall after frequent use.
Steps on How to Install Window Roller Shades
Here’s a simple and helpful guide to walk you through each step of installing window roller shades properly.
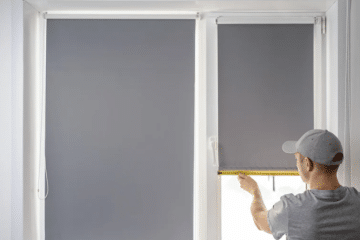
Step 1: Measure Your Window
Proper measurements are crucial for a perfect fit. Here’s how to measure:
- Inside Mount: Measure the width and height inside the window frame for a good fit.
- Outside Mount: Measure the area for the shade and add a few inches on each side to ensure it is fully covered.
Write down the measurements and double-check before purchasing your roller shade.
Step 2: Choose the Mounting Style
Roller shades can be installed in two ways:
- Inside Mount: Fits within the window frame for a sleek look.
- Outside Mount: Mounts above the window frame, ideal for better light blockage.
Determine which style best suits your needs before proceeding.
Step 3: Mark the Bracket Positions
Hold the roller shade up to the window and mark where the brackets should go with a pencil. If doing an inside mount, ensure the brackets align with the top corners of the window frame.
For an outside mount, position them slightly above and wider than the window.
Use a level to make sure your marks are straight and even.
Step 4: Install the Brackets
- For Wooden Frames: Pre-drill small holes to prevent splitting, then screw the brackets in place.
- For Drywall: Use wall anchors to secure the brackets firmly.
Ensure the brackets are securely fastened to support the shade’s weight.
Step 5: Attach the Roller Shade
Once the brackets are secure:
- Insert the roller shade’s pin (or spring end) into the bracket.
- Snap the other side into place.
- Test the shade by pulling it down and rolling it back up to ensure smooth operation.
Step 6: Adjust & Finalize
Check that the shade moves up and down smoothly without tilting. If it shifts to one side, gently adjust the brackets to help improve balance and ensure it stays properly aligned.
If there’s too much fabric hanging, carefully trim the excess. Some roller shades come with cutting instructions, so follow them for the best results and a neat, finished look.
Mistakes When Installing Window Roller Shades

Even though learning how to install window roller shades is straightforward, here are some pitfalls to avoid:
1. Incorrect Measurements
Always measure your window frame carefully before starting. Check your numbers twice to avoid mistakes when cutting or installing. Even a small error can make the roller shades fit poorly. Measuring twice saves time, money, and ensures your shades function properly.
2. Uneven Brackets
If your brackets aren’t level, the roller shade might hang crooked or not function properly. Use a level tool to make sure everything is straight. Taking your time here helps the shade roll smoothly and look neat once it’s installed on the window.
3. Weak Anchoring
Brackets must be attached tightly, especially when installing them on drywall. Use the correct screws or wall anchors to secure the roller shades. If not done correctly, the shades could fall and damage your wall or the shade itself.
4. Ignoring Instructions
Always read the instructions that come with your roller shades. Skipping steps can lead to problems or damage. The guide instructs you on the tools and parts to use, as well as the correct steps to follow for a smooth and safe installation.
Maintenance Tips for Long-Lasting Roller Shades
To keep your shades in top condition:
1. Dust Regularly
Keep your window roller shades clean by dusting them every week. Use a soft cloth or a vacuum with a brush. This helps prevent dust from building up and makes your shades last longer. Clean shades also help your home look neat and fresh.
2. Spot Clean Stains
If your fabric shades get a small stain, mix a little soap with water. Gently wipe the spot using a soft cloth. Don’t scrub too hard. Cleaning stains right away helps keep your shades looking nice and prevents dirt from setting in.
3. Check Mechanisms
Every few weeks, look at the parts that help your roller shades move. Tighten any loose screws and add a small amount of oil if necessary. This helps the shades roll up and down smoothly, keeping everything functioning properly.
Conclusion
Bring new life to your space with stylish window roller shades that combine beauty and function. A smooth installation creates a clean, polished look that instantly upgrades any room with minimal effort and cost.
Our guide on how to install window roller shades gives you simple tips for a smooth process from start to finish. With the right tools and clear steps, your shades will be up and running in no time.
For expert support, trust Atlas Solar-Tex to provide high-quality shades and seamless installation services. We bring years of experience and top-notch materials to every home we work on.
Reach out today at (817) 447-3500 for expert guidance or shade recommendations. We’re here to make your window upgrade simple, smooth, and ideally suited to your home’s needs.
Frequently Asked Questions
How do you install roller blinds step by step?
To install roller window shades, measure your window and mark the locations where the brackets should be placed. Use a drill to make holes, then screw the brackets in place. Snap the roller into the brackets and test if it rolls up and down smoothly.
What’s the correct way to hang a roller blind?
The correct way to hang roller window shades is to first decide whether you want them installed inside or outside the window frame. Attach the brackets, fit the roller in, and check if it moves up and down smoothly without any issues. Make sure everything is straight.
How to install roller shade brackets?
To install brackets for roller window shades, mark the right spots where you want them. Use a drill to make small holes, then screw in the brackets tightly. Once they’re secure, place the roller into the brackets and make sure it turns smoothly.
How to properly install window shades?
Start by measuring your window and marking the locations where the brackets will be placed. Drill the holes, screw in the brackets, and snap the roller window shades into place. Ensure everything is level to prevent the shade from rolling unevenly or getting stuck while in motion.
How to use roller window shades?
Using roller window shades is simple. Pull the chain or the bottom bar to raise or lower the shade. Some shades have a spring system, so just give them a light pull to open or close. They help control light and add privacy.
End Note
Transform your windows with beautiful and functional shades from Atlas Solar-Tex. If you want to learn how to install window roller shades, we offer the right solutions to make your upgrade easy and smooth.
Visit our About Us page to see our experience and service promise. We offer simple shade solutions that match your home and help keep your space cool, private, and comfortable every day.
Discover our roller shades, which offer privacy and light control. You can also share your favorite styles on Facebook, X, or LinkedIn to show others what you love.
For quick assistance or to schedule a service, visit our contact page. We make every step simple and take care of everything, so your home looks and feels just right.
Atlas Solar-Tex
6817 Sundance Cir W. Joshua, TX 76058
+18174473500